I came across a really neat tutorial over at Creating Keepsakes' Blog on making your very own chevron design from your stash! What a great idea--and I
One thing I learned while trying to figure out how to do this: the size of paper doesn't matter. In this particular project, each piece of patterned paper to make up the sides of the chevron are 1'(w) by 3'(l). The longer and wider they are, the higher and deeper your chevrons become! Also, remember to alternate which sides you fold down with each strip of patterned paper you use. It took me quite a while to figure out why it wasn't working...it wasn't until the first half were adhered to the card stock background that the little proverbial lightbulb came on.
So, to explain a little more precisely: with your first piece of patterned paper, fold down the top left corner, so it makes a triangle shape, then fold the bottom right edge up; on your next strip of patterned paper, fold the bottom left portion up, and the top right portion down, always making little triangles. When you fit the folded edges together, it should make the chevron pattern. (If I am not making sense, head on over to Creating Keepsakes--it'll make sense there).

(You can see a ton of fold lines in this strip of patterned paper because I was using it to practice)

Top left corner folded down

Bottom right corner folded up

This is the second strip of patterned paper; fold the bottom left portion up

Fold the top right portion down
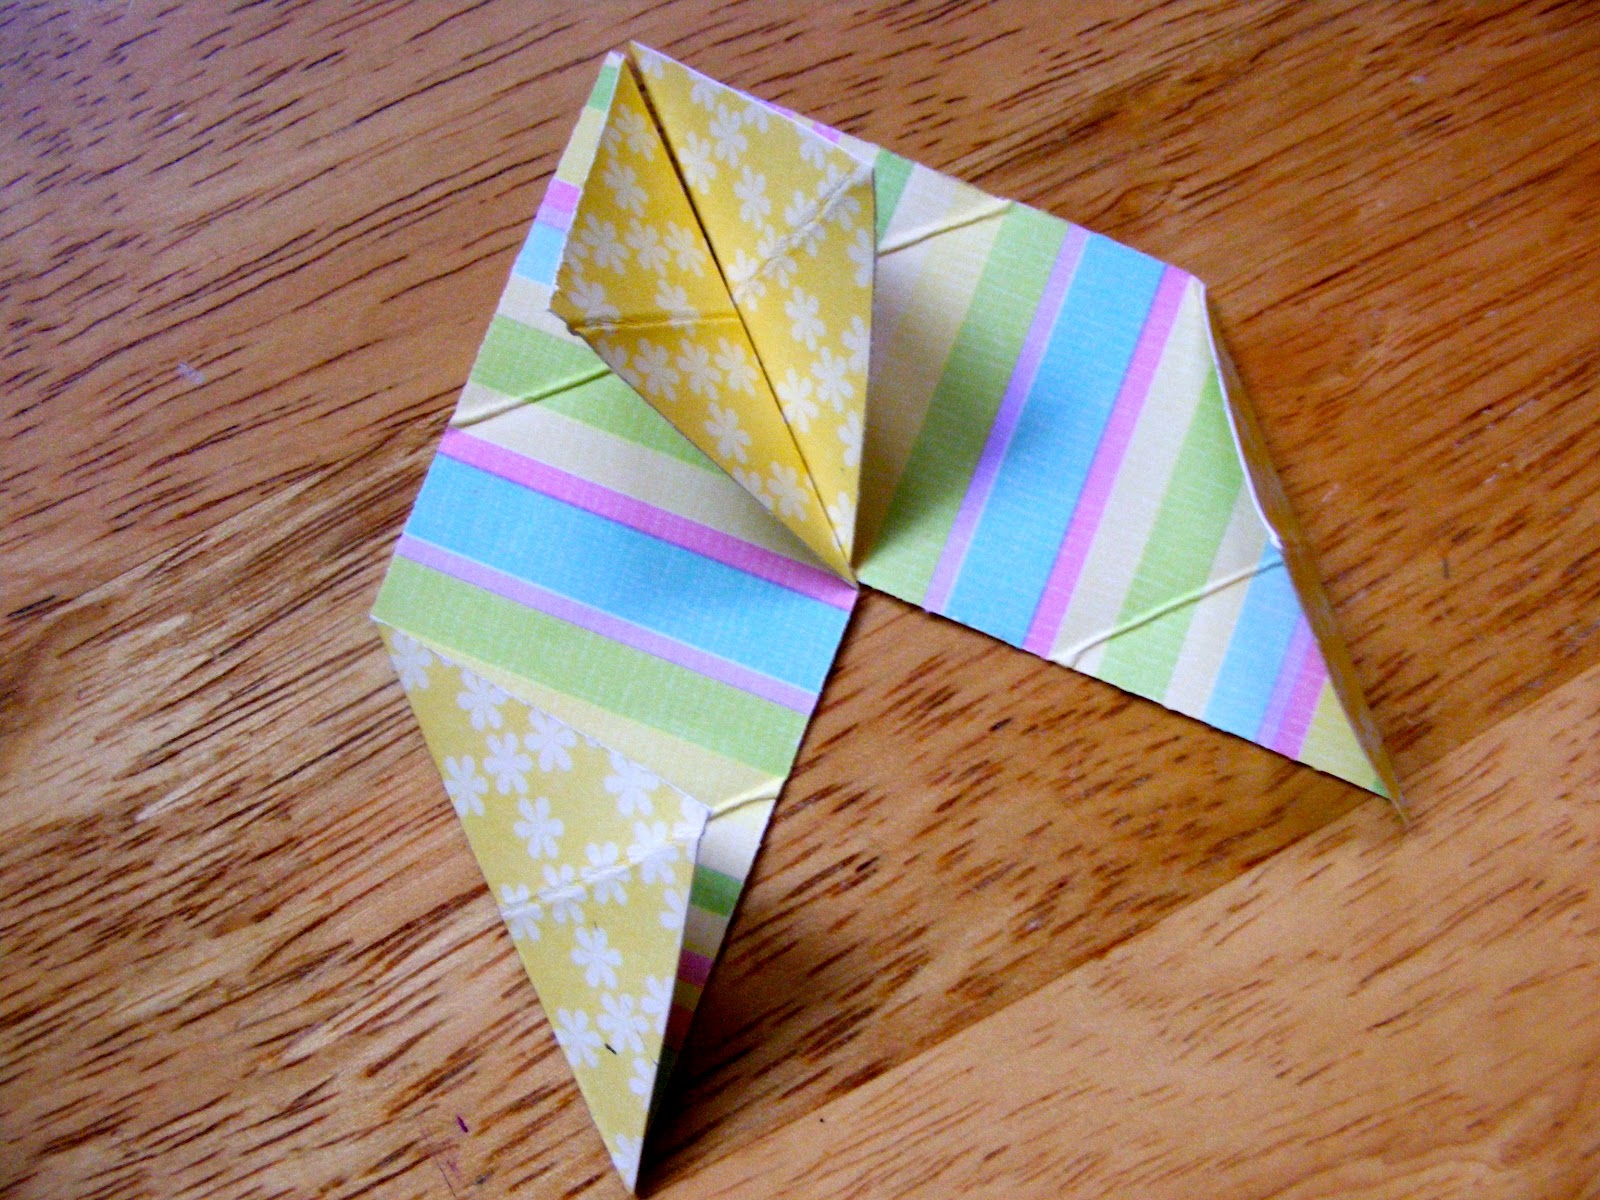
When both strips of patterned paper are aligned, you've got the chevron pattern! Voila!
And, here's the masterpiece I made using this technique:

This was made using sketch #141 over at Let's Capture These Sketches. Definitely head over there and see what the girls have done with this beautiful sketch!
If you make any projects using this technique, send me the link so I can see too! I'd love to see how you use it. And, don't forget to drop by Creating Keepsakes and link your project to their blog, too!
Awesome use of this tutorial, Ali! I love your wonderful page that you created with it! And thanks so much for sharing it with us!!!
ReplyDeleteLove this. I am going to have to add this to my techniques to try. Thanks for the great tutorial.
ReplyDelete